Request Revisions for a Submitted Data Form
Allow the Prospect to edit their Data Form Submission

Introducing the Request Revisions Feature in Impact DashBoard
We are constantly working to enhance our software and provide features that simplify your workflow. We are excited to introduce a new feature in Impact DashBoard that allows you to request revisions for a submitted Data Form. This feature is designed to ensure you receive the most accurate and complete information from your prospects. Here’s everything you need to know about this new functionality.
The Big Idea
Our latest feature enables you to request and receive revisions to a submitted Data Form. Here’s how it works:
1. Request Revisions for a Submitted Data Form
Once a Data Form is submitted, the responses are locked and cannot be modified by the prospect. Previously, if any changes were needed, the prospect had to fill out the entire Data Form from scratch. With this new feature, you can now request revisions to update or add information without starting over.
2. New Link for the Prospect
When you request a revision, the prospect will receive a new link that includes a copy of their originally submitted Data Form responses. They can edit or add information as needed.
3. Revised Data Form in Your Inbox
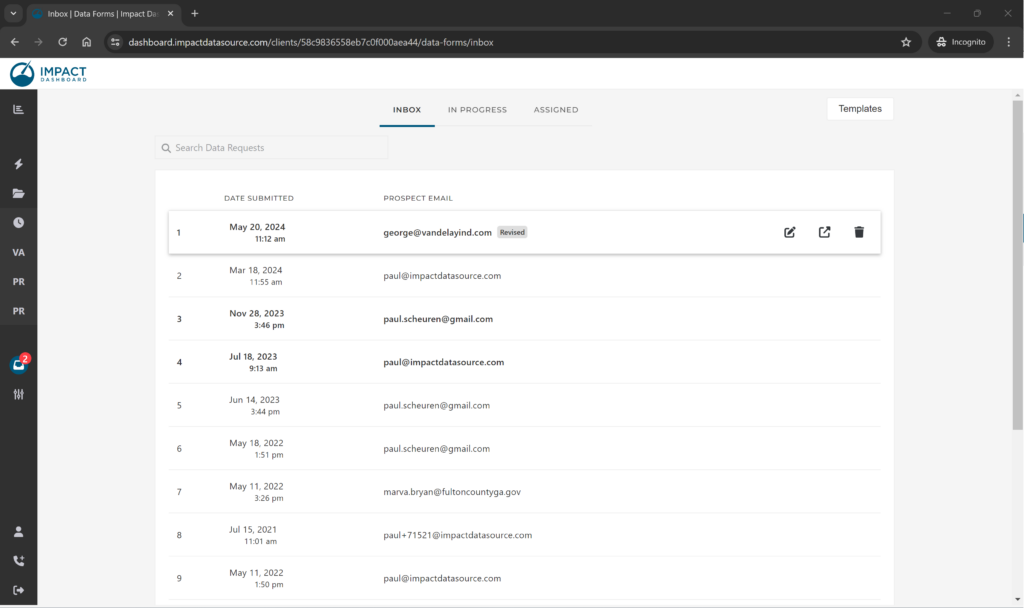
After the prospect submits the updated information, the revised Data Form will appear in your Inbox. The original Data Form will remain unchanged, and you will receive a second form identified as “Revised.”
How to Request Revisions
Requesting revisions for a submitted Data Form is straightforward. Here’s a step-by-step guide:
1. Locate the Submitted Data Form
Navigate to your Data Forms Inbox or the Project Control Center.
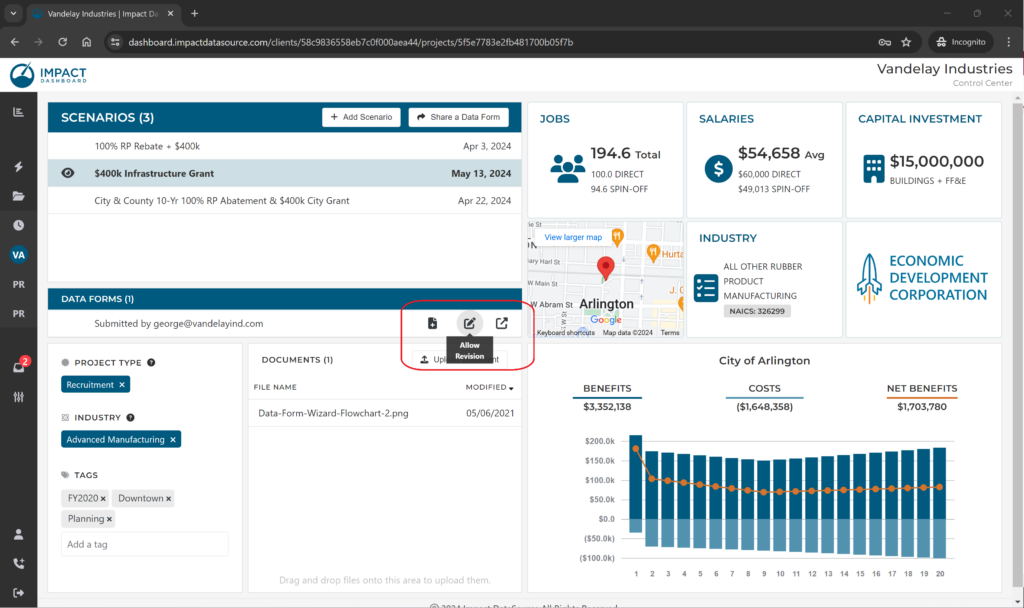
2. Hover Over the Data Form & Click Edit Icon
While hovering over the submitted Data Form, you will see an Edit icon (a square with a pencil). Click on the Edit icon to request a revision from the prospect.
3. Request Revisions by Email or Custom Link
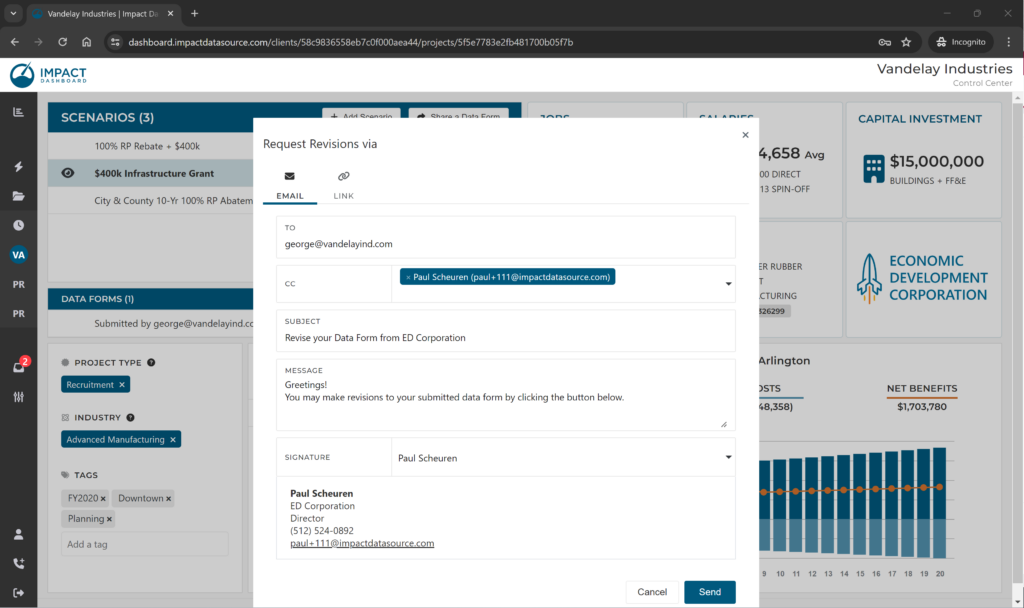
- Email Request: Enter the prospect’s email address, customize the email message, and send the request. The prospect will receive an email with a link to the Data Form that can be edited.
- Custom Link: Generate a custom link that can be shared directly with the prospect, allowing them to access and edit the Data Form.
4. Prospect Receives the Request
The prospect will use the provided link to update their Data Form.
5. Receive the Revised Data Form
Once the prospect submits the revised form, it will appear in your Inbox marked as “Revised.”
6. Assign Data Form to a Project and Create a Scenario
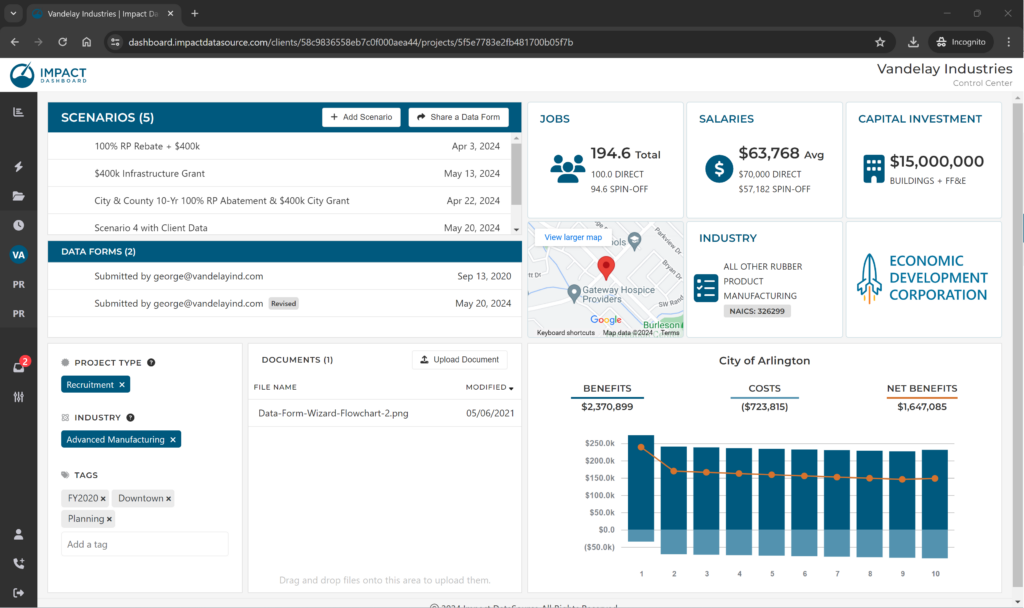
The final step after receiving a revised Data Form is to assign it to a Project and create a new Scenario.
Flexible Input Lengths for Data Form Templates
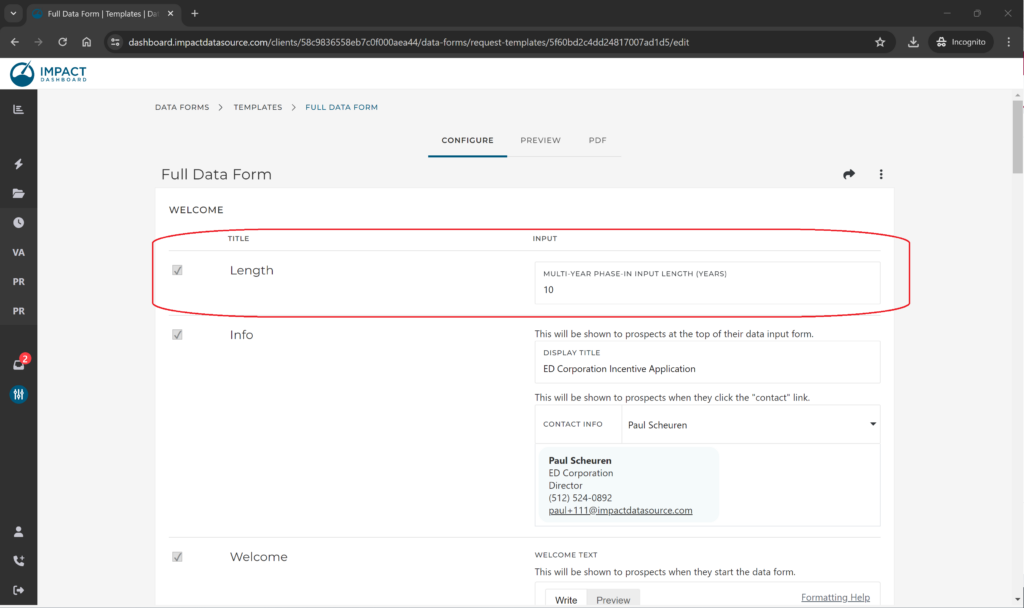
Another new feature in Impact DashBoard allows you to adjust the input length associated with a Data Form Template. This enhancement provides greater flexibility and customization and allows you to collect the exact right amount of data from your prospects.
Previously, the input length for Data Forms was fixed at 5 years. With this new feature, you can now enter any length you desire, whether it’s 3 years, 10 years or even longer.
How to Adjust Input Length
1. Navigate to the Data Form Template you wish to modify within Impact DashBoard.
2. On the Configure tab, locate the input length settings. You will now see an option to customize the Multi-year Phase-in Input Length (Years). Enter the desired length for your Data Form.
3. Data Form requests initiated from this Template will now allow for multi-year inputs equal to the length you specified.
Note: You can adjust the Scenario length independently from the term used for the Data Form. This means you can have a Data Form with inputs for a specific duration and create scenarios with different time frames as needed.

