Impact DashBoard Knowledge Base
Settings
To view a comprehensive list of all settings and assumptions for a specific Scenario, click on Settings (gear icon) located in upper right corner of the Scenario Workspace.
The Settings page allows you to review and edit any assumption, demographic parameter, or tax rate. The menu on the left of the page allows you to navigate directly to specific inputs or sections.
General Assumptions
The General Assumptions tab within the Settings page allows you to review and edit several critical assumptions that apply to the entire Scenario.
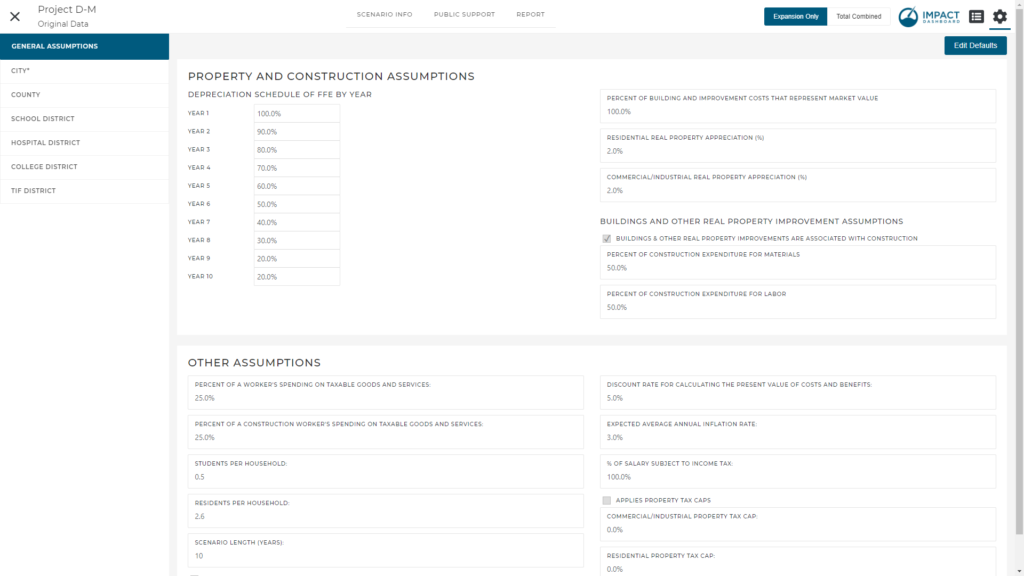
By default, and to prevent unintended modifications, the General Assumptions tab requires you to click “Edit Defaults” before the inputs can be changed. You can edit any input on the General Assumptions tab after clicking “Edit Defaults”.
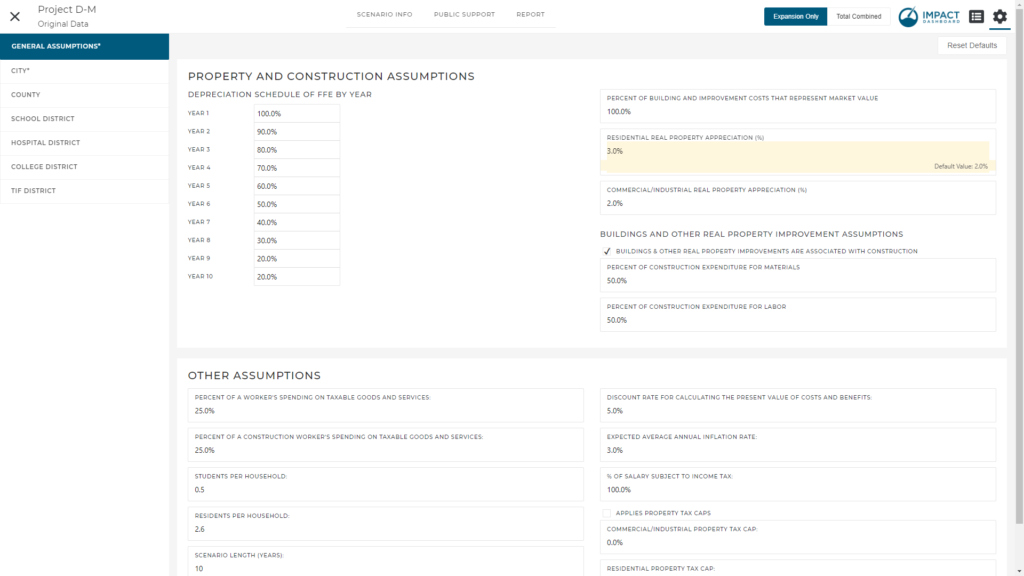
Inputs that have been modified from the original default value will be highlighted and the default value will be noted. If desired, you can click “Reset Defaults” to revert back to the original default values used on the General Assumptions tab.
Changes that you make on the General Assumptions tab of the Settings page only apply to the Scenario you are viewing and will not affect previous Projects or Scenarios. Similarly, modifying General Assumptions on a Scenario will not affect Scenarios that you create in the future. However, the exception to this is if you create a copy of a Scenario. Copying a Scenario will copy all adjusted Settings along with the Scenario & Company Info and Public Support data.
If you would like a parameter on the General Assumptions tab changed so that the adjusted assumption applies to all future Scenarios, please contact Impact DataSource to make the change for you
The following assumptions can be found on this tab:
- Property and construction assumptions
- Depreciation schedule of FF&E by year
- Percent of building and improvement costs that represent market value
- Real property appreciation rate
- Buildings and other real property improvement assumptions
- Are buildings & other real property improvements are associated with construction?
- Percent of construction expenditure for materials
- Percent of construction expenditure for labor
- Other assumptions
Taxing District Assumptions
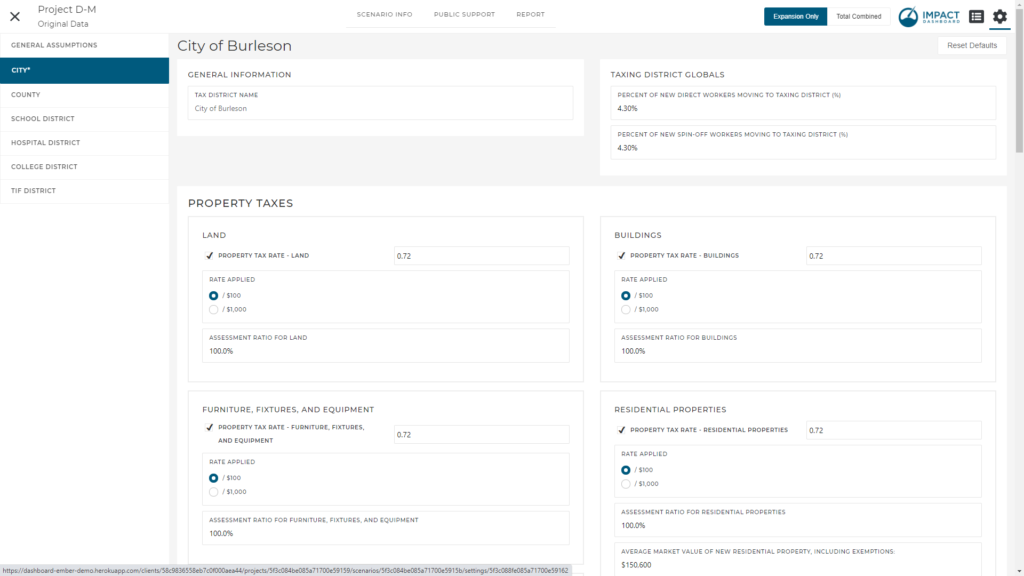
Assumptions for each Taxing District are accessible from a tab on the left side within the Settings page. From this area, you can review and edit all Taxing District-specific assumptions that apply to the Scenario. Generally speaking, Taxing District assumptions reflect how a Taxing District collects revenue and incurs costs as a result of economic development projects. In short, the Taxing District assumptions model the tax structure of the community.
By default, and to prevent unintended modifications, the Taxing District tab requires you to click “Edit Defaults” before the inputs can be changed. You can edit any input on the Taxing District tab after clicking “Edit Defaults”.
Inputs that have been modified from the original default value will be highlighted and the default value will be noted. If desired, you can click “Reset Defaults” to revert back to the original default values used on the Taxing District tab.
Changes that you make on a Taxing District tab of the Settings page only apply to the Scenario you are viewing and will not affect previous Projects or Scenarios. Similarly, modifying Taxing District assumptions on a Scenario will not affect Scenarios that you create in the future. However, the exception to this is if you create a copy of a Scenario. Copying a Scenario will copy all adjusted Settings along with the Scenario & Company Info and Public Support data.
If you would like a parameter on the Taxing District to be changed so that the adjusted assumption applies to all future Scenarios, please contact Impact DataSource to make the change for you
The following assumptions can be found on this tab:
- Percent of new direct & spin-off workers moving to taxing district
- Property Taxes
- Sales Taxes
- Income Taxes
- Hotel Taxes
- Other Revenues
- Costs
- Custom Report Methodology Text
TIF District Assumptions
Tax increment financing is a common economic development financing technique and can be modeled easily in Impact DashBoard. You can create a TIF District that will receive all or a portion of the incremental tax revenues generated from a Project’s property or sales. The TIF District will be added to the model as a quasi-Taxing District and the Detailed Report will incorporate information about revenues directed to the TIF District from existing Taxing Districts as well as the revenues received by the TIF District.
Follow these steps to apply a TIF District to a Scenario:
- Start by clicking on the Settings (gear icon) in the upper right corner of the Scenario Workspace. You will see a tab on the left called “TIF District”.
- Select the “TIF District” tab and click on the box that says “Project Located in TIF District”.
- You will have the option to choose an existing TIF District that you may have saved to your account or create a name for the TIF District.
- In the case of newly created TIF District, complete the table shown on the screen by identifying the portion of incremental taxes contributed to the TIF District. You can specify the portion of taxes as a percent of the total tax rate or as a specific amount. For example, if the City were to contribute ALL of its property taxes on the incremental property to the TIF district, you could put 100% in the city input fields. Some clients may need a little bit more precision. For example, if the tax rate is 5.2 but the city contributes 3.0 of the tax rate to the TIF, you can enter the contribution as the Amount of Tax Rate vs. Percent of Tax Rate.
- You have the ability to save the TIF District specifications to apply to future Scenarios. Click on “Save TIF District Specifications for Future Use” if you would like to save the TIF District details so that you can apply it to other Scenarios.
Note: You can manage your TIF District Profiles on the My Account page. Saved TIF District Profiles can be incorporated into any Scenario.
Seeing the Results of the TIF District
The reports will update to include the effect of these calculations and create a new entity for the TIF District so you can see the total revenue it receives, potentially from multiple Taxing Districts. The Detailed Report Appendix will include year-by-year tables showing the revenues calculated for the TIF District. Remember, the other districts that contribute to the TIF District will see reductions in property tax revenue when considering a project in the TIF District.
An Expiring TIF District / Adjust TIF Duration
If the TIF District is expiring within the term of the analysis, you can indicate the duration of the TIF District on the Settings > TIF District tab. For example, if you are conducting a 10-year analysis but the TIF District is scheduled to expire in 5 years, you can specify 5 years in the field marked “Number of years which the TIF District will apply”. This will apply the TIF District calculations for the first 5 years and then calculate property tax as normal for the remaining 5 years.